Grooming a matted cat at home is a triage job before it is a brushing job. The felted patch behind the ear that feels like a dryer ball will not come out with more pressure, and the cat will not forgive you for trying. I have spent ten years finishing other people's dogs and, more reluctantly, a lot of other people's cats, and cats are the animals that teach you the order of operations fastest: read the cat, decide whether the coat brushes out or comes off, then pick the tool that matches that decision.
This is the order I work in. Two tools carry almost all of it, one for a coat that still moves and one for a coat that has already locked down. Everything else is technique, and technique is free.
Why you should trust me
I have been grooming for ten years, the last six out of a converted cargo van I park in driveways all over Austin. I started at 19 as a bather at a strip-mall salon, and on my third week the only groomer quit mid-shih-tzu, so I finished the dog with a 10 blade, a lot of patience, and a bruised thumb. I have been finishing other people's dogs ever since.
I am fear-free certified, which means I read stress signals (lip licks, yawns, whale eye) and change the plan when the animal is scared. Cats are not my favorite part of the job and I will say that out loud. They are, however, the animals that punish a bad tool choice fastest. A cat that decides the clipper is too loud does not argue with you, it leaves, and then you are the person holding a half-finished cat.
The job book in the van holds the numbers behind every recommendation I make: blade temps logged with an infrared thermometer, runtimes timed on my phone, decibel readings from a cheap meter, and grams of undercoat weighed on a kitchen scale. If a tool did not survive the dogs and cats, it does not survive the review.
How I picked and how I tested
Nothing gets recommended here without a coat test, and with cats the coat test is only half of it. The other half is tolerance. A deshedding tool that lifts fur beautifully but makes the cat flinch is a tool that lives in a drawer, and I have watched too many of those.
For the brush in this guide, I looked at three things: how much loose coat it lifts off a long-haired cat, whether the pins scratch skin when the cat rolls, and whether the self-cleaning mechanism actually releases the fur or just packs it into the base of the pins. For the clipper, I looked at noise first, because noise is the reason most home cat clips fail, then whether it bogs down on a dense mat, then how the blade behaves after a few minutes of continuous work.
Two rules from my own book apply to everything below. No blade over 110°F, measured on the metal rather than guessed by hand. And no tool that a cat lip-licks through for a full session, because that cat is telling you the truth and the box is not.
How to tell whether the mat will brush out or has to come off
Before you buy anything or plug anything in, put your hands in the coat and answer one question. Can you get a finger, or the tip of a comb, between the mat and the skin?
If yes, you have a tangle. Tangles are workable. You chip at them over several short sessions with a slicker and your fingers, working from the outside of the mat inward, never from the skin outward. A tangle that took three weeks to form does not come out in one sitting, and a cat that is held down for twenty minutes learns that brushing hurts.
If no, you have a pelt. A pelt is a mat so dense it sits on the skin like a jacket, and no brush on the market removes one. Every tool that claims otherwise is selling you a second appointment. Pelts come off with clippers, close to the skin, in the direction the coat grows, and the cat starts over.
One more rule that saves coats: never bathe a matted cat first. Water tightens a mat and pulls it toward the skin, which is how a workable tangle becomes a pelt in ten minutes. Get the coat loose first. Bath after.
The two tools that do the work
You need one tool for the coat that still moves and one for the coat that does not. That is the whole shopping list for a home groomer.
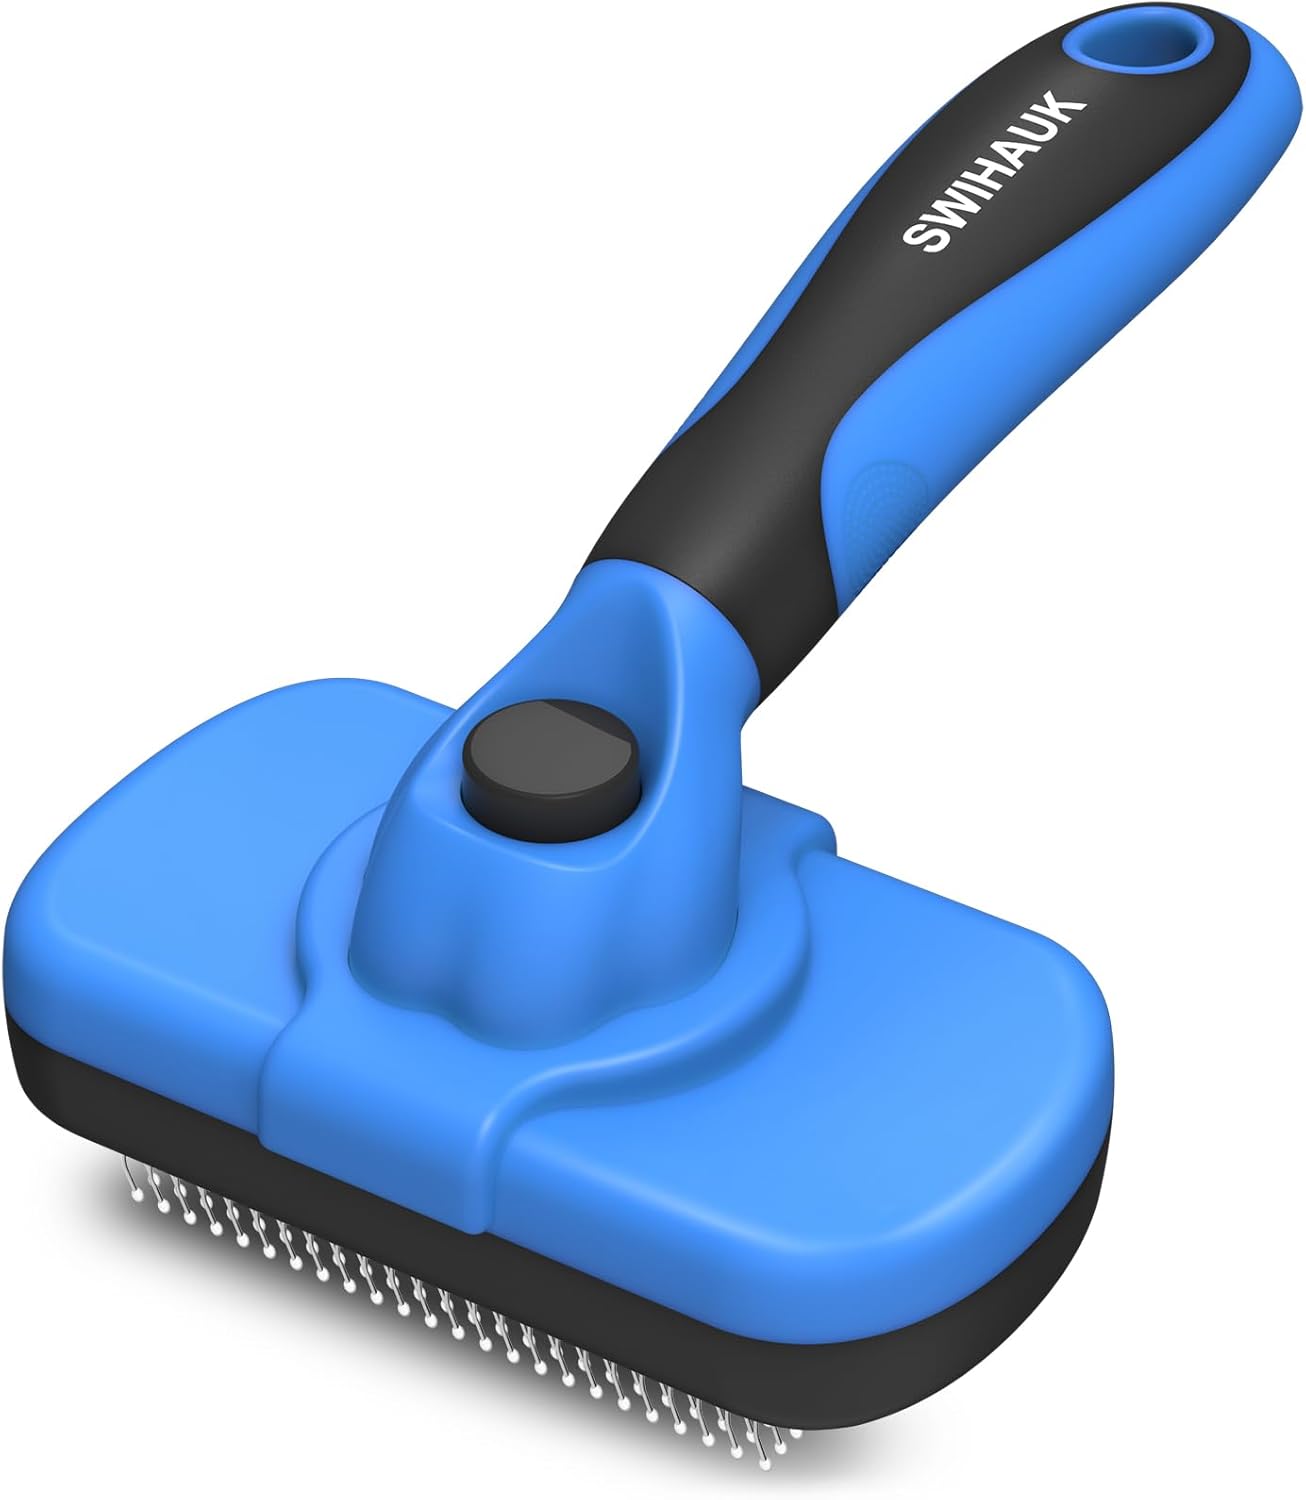
Daily coat work: Swihauk Self Cleaning Slicker Brush - Skin Friendly Deshedding Grooming Tool for Dogs & Cats, Suitable for Shedding & Haired Pets, with Pet Supplies Accessories, Blue
 Visit on Amazon →
Check current Amazon price. This is the brush that handles the 90% of the job that is not a mat: the loose undercoat that turns into mats if you leave it, and the surface coat that needs to move every few days on a long-haired cat. The pins are fine enough to get under loose fur without raking skin, which matters because a cat's skin is thinner than a dog's and it sits closer to the surface of the coat. The self-cleaning button is the feature that earns its keep. You press it, the pins retract, and the fur drops into the trash instead of into your hand, which means you can work a full coat without stopping to pick the brush every thirty seconds. On a cat, those thirty seconds are the difference between finishing and losing the animal.
Flaws but not dealbreakers: This is a slicker, not a de-matting tool. Used on a pelt, it will pull and the cat will remember. The button needs a firm press all the way down or the pins only half retract. And the handle is sized for an average hand, so if you have large hands or a very small one, expect to adjust your grip.
This is the brush for a cat whose coat is still moving, and for the maintenance schedule that keeps it that way.
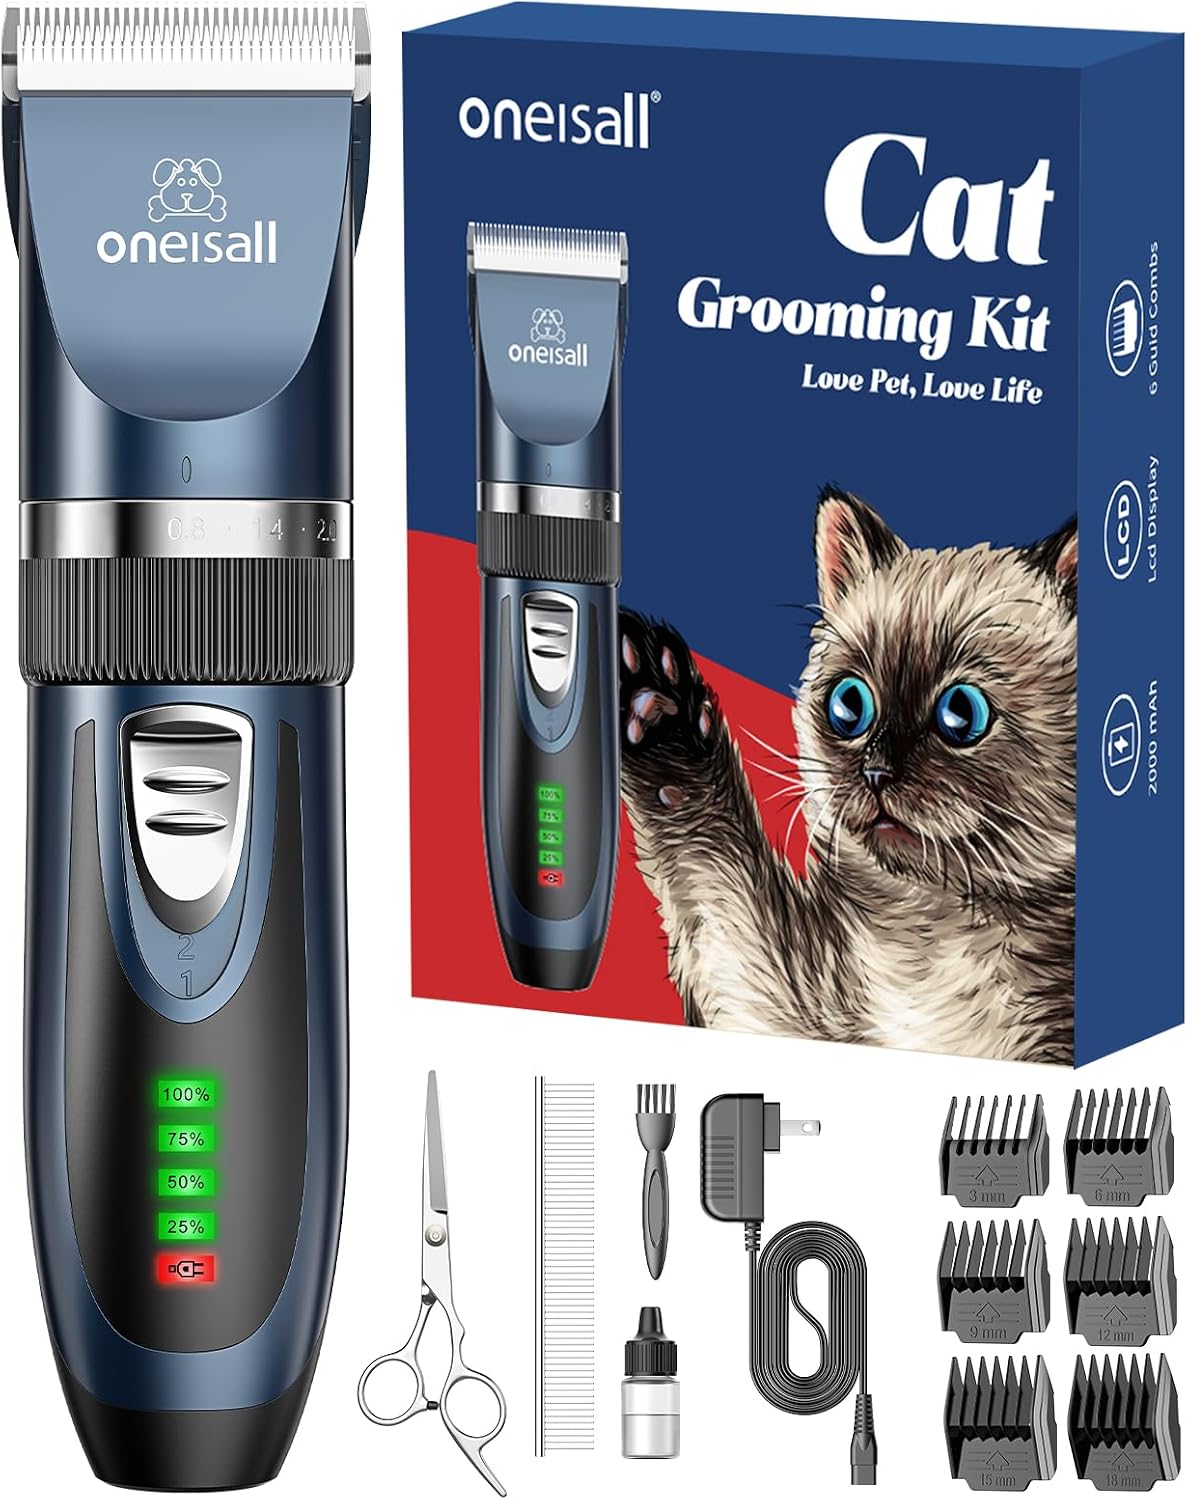
When the mat wins: oneisall Quiet Cat Clippers for Matted Hair & Long Hair, Cat Shaver
 Visit on Amazon →
Check current Amazon price. When the mat is a pelt, this is the tool that ends the problem instead of arguing with it. It is built for cat coats, which means a narrower blade and a lower noise level than the dog clippers most people already own, and noise is the whole battle with cats. A clipper the cat tolerates gets the job done in one session. A clipper the cat hates turns a ten-minute shave-down into a two-person wrestling match and a cat that hides under the bed for a week.
Use it with the blade flat against the skin, moving in the direction the coat grows, taking short passes rather than long pushes. Let the blade do the cutting. If you have to press, the blade is dull or the mat is denser than the tool wants, and pressing is how cats get nicked. For a cat that is matted but not pelted, this clipper is also the cleanest way to do a sanitary trim and to take down the belly and armpit spots that brushes cannot reach without a fight.
Flaws but not dealbreakers: It is a cat clipper, not a dog clipper. On a thick double coat it will slow down, and on a big matted cat you will be making a lot of short passes. The blade is not a detachable A5 system, so when it dulls you replace the head rather than swapping blades. If you groom one cat a few times a year, that trade is fine. If you groom five, buy a pro clipper.
This is the tool for the cat that is already past brushing, and for the spots on a long-haired cat that never get brushed enough.
The actual workflow
This is the order I run in the van, and it works in a bathroom at home with the door closed.
Step one: Set the room before you touch the cat. Closed door, no other pets, no kids moving through. A non-slip towel on a counter or a table at waist height, because grooming a cat on the floor is how backs get wrecked and cats get cornered. Good light. Clippers and brush within reach so you are not leaving the cat to go find something.
Step two: Read the cat before you pick up a tool. Ears back, tail flicking, pupils wide, lip licking with no food around. Those are the signals that tell you how long this session is going to be. Give the cat two minutes of quiet handling first. If it settles, work. If it does not, do one small section and stop. A short session that ends well buys you a longer one tomorrow.
Step three: Work the loose coat first, with the slicker. Short strokes, with the direction of the coat, starting at the shoulders and working back. Do not dig at the skin. The point of this pass is to lift the fur that is already loose so it does not feed the mats.
Step four: Isolate the mat. Slide your fingers under it. If it moves, you have a tangle. Work it from the outer edge inward, a few passes at a time, then give the cat a break. If it does not move and it sits on skin, stop brushing. You are done with the brush for that patch.
Step five: Choose the exit. Tangle, brush it out over days. Pelt, clip it off in one session and start the coat over. There is no third option, and the middle ground of "just a little more brushing" is how cats end up with hot, irritated skin.
Step six: Clip with the blade flat. Direction of coat growth, short overlapping passes, blade flat to the skin rather than angled into it. On a pelt, you are taking the mat off, not sculpting. If the cat has had enough, clip one patch and finish tomorrow. Half a shave-down beats a cat that never lets you near it again.
Step seven: Save the belly, armpits, and rear for last. These are the spots cats guard hardest, and they are also where mats form first. Do them when everything else is already done, so if the cat taps out, the visible coat is finished.
Step eight: Check the skin and stop. Run your hands over everything you clipped. Pink, irritated skin means the blade got hot or you pressed. Rest the clipper between passes so the blade never sits hot against skin, and keep a spare head if you are doing a full cat. Then end the session on something the cat likes. Treats, a quiet room, no more handling for the day.
What not to reach for
Household scissors are the single most common cause of the cat wounds I see. Cat skin is thin and moves, and a mat sits right on top of it, so the scissor tips go under the mat and into the skin before you feel any resistance. I have seen the vet bills. If a mat has to come off, it comes off with clippers.
Human hair clippers are the second mistake. They run hotter, they are louder, and the blade geometry is built for straight human hair, not a dense cat coat. They bog, they heat, and a hot blade on a cat's flank is a burn.
A fine-tooth comb on a mat is the third. It does not remove the mat, it pulls the skin up into it, and the cat learns that the comb is a trap.
Water before the mat is gone is the fourth. See above. Mats tighten when wet.
And the fifth, which is really a handling mistake: holding a cat down while someone else works on it. Restraint makes a stressed cat more stressed, and stress is what turns a ten-minute job into a fight. If the cat needs a second pair of hands, those hands should be supporting, not pinning.
What this costs you, in time
The tools are the cheap part of this. Check current Amazon price on both and you will spend less than one professional shave-down.
The real cost is minutes, and the math is straightforward. A long-haired cat with a coat that still moves needs about five minutes of slicker work three times a week, plus a full brush-out once a week. That is roughly twenty minutes a week to keep a coat out of the matted range.
Once a cat is pelted, the math changes. A shave-down is a single session of fifteen to thirty minutes with the clipper, depending on how much of the cat is involved and how patient the cat is, and then you start the maintenance clock over from zero. Three weeks of skipping the brush costs you a shave-down. Twenty minutes a week costs you nothing but the twenty minutes.
The short version
Decide early whether the mat brushes out or comes off, because everything else follows from that one answer. Keep the coat that still moves moving with a slicker a few times a week. Keep a quiet clipper on hand for the pelt that brushing cannot fix. Never bathe a matted cat, never put scissors on a mat, and stop the session while the cat still trusts you.
That is the job, and it is a smaller job than most people think. The cats that end up in my van matted are almost never the ones whose owners did too little. They are the ones whose owners waited until it was a pelt before they started.